This is a step by step instruction on how to access and use Xero Files, including uploading of documents.
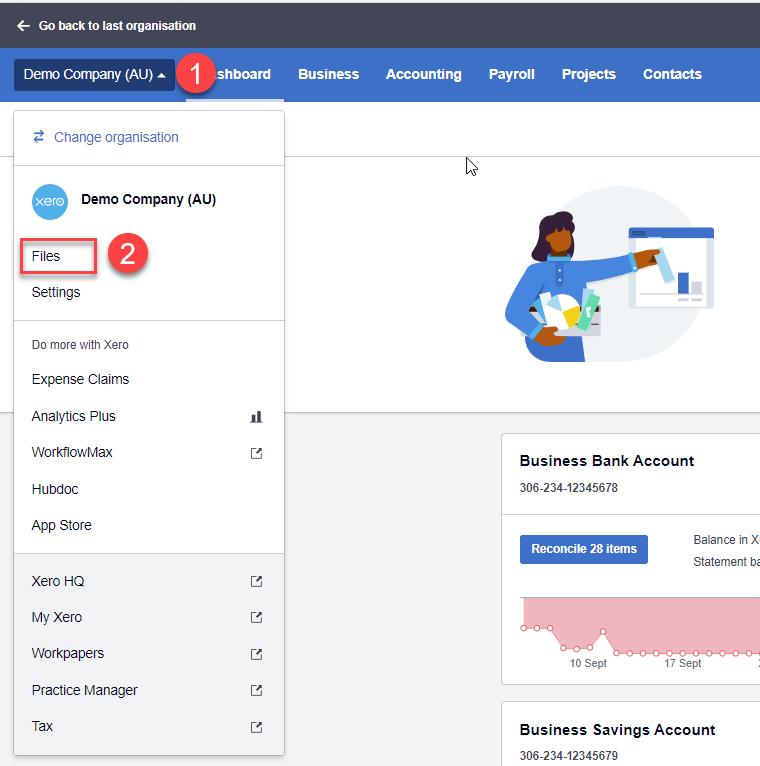
1. In the top left of your Xero file, select your Organisation Name.
2. From the drop down menu, select 'Files'
3. Xero Files will open. You can either select an existing folder from the left hand side. Or you can Create a New Folder.
4. Click on
'Upload File' to start the process of adding a document to Xero Files.
5. This is the email address that you can use to send information directly to Xero Files. When it is inside Xero Files you can add to relevant folders or use it to create a transaction.
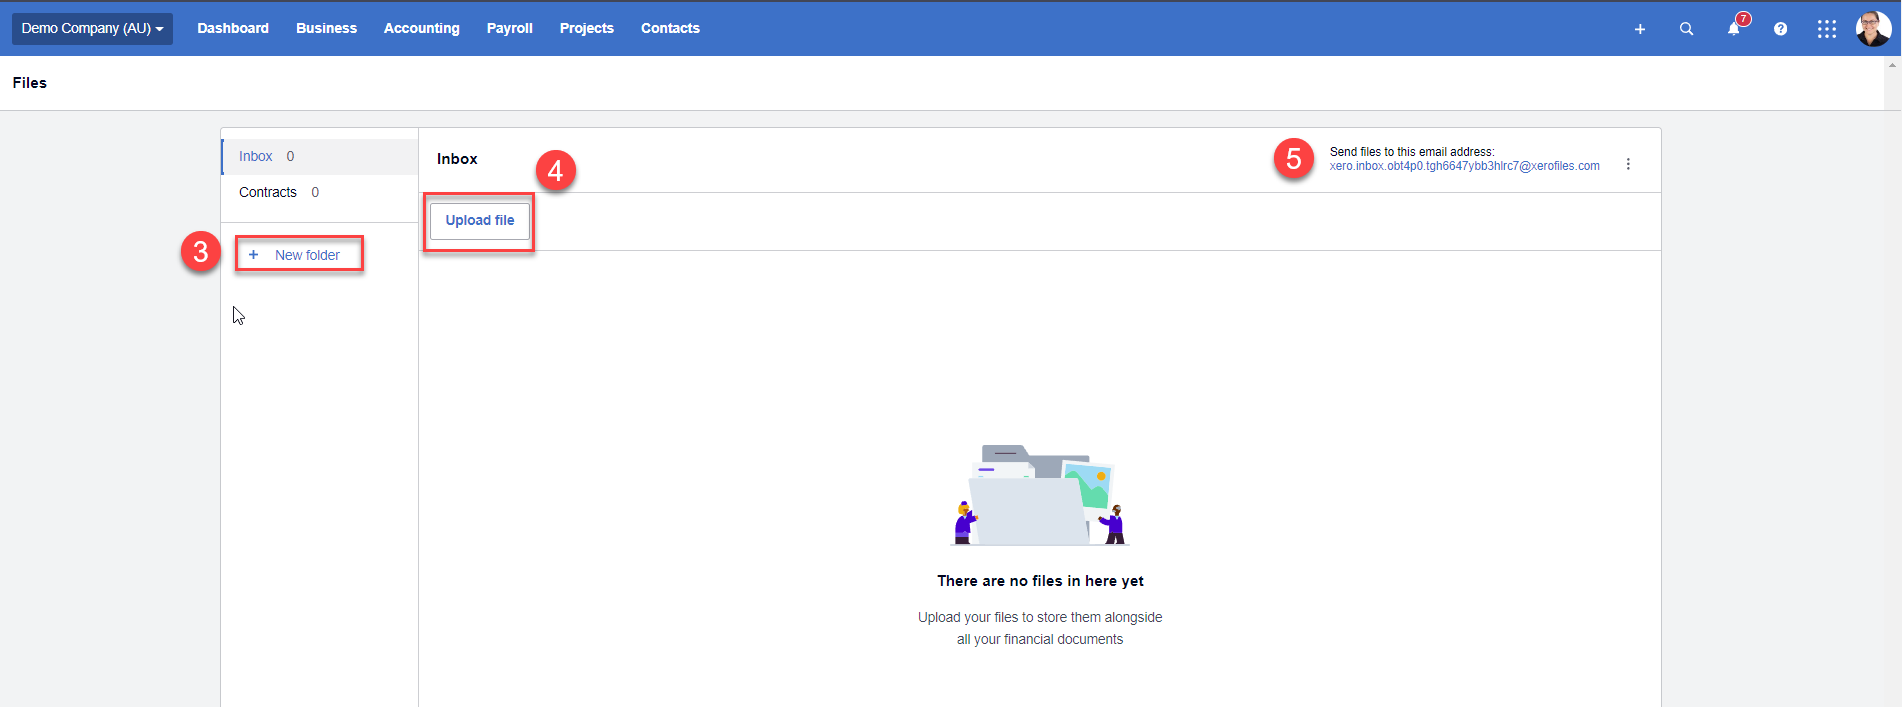
Where you need to Create a New Folder, click on this (3)
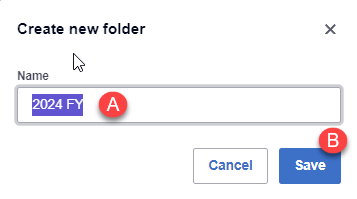
A new pop up will open. Put the name of the folder in at (A). Once you have done this, click
Save (B)
We recommend using folder names that matter and enable you to group your documents in a logical way. For example, you could have a 2024 FY folder that has all of your year end documentation here.
Or you could have a Clients Folder that enables you to put all invoicing related documents inside there. It is completely up to you.
Once the folder has been created you can choose to Rename it if you wish. To do this, click on the name of the folder you have just crated and from the right hand side you can select the
'Options' button. This will open a sub menu and you can choose to either '
Rename' or
'Delete'

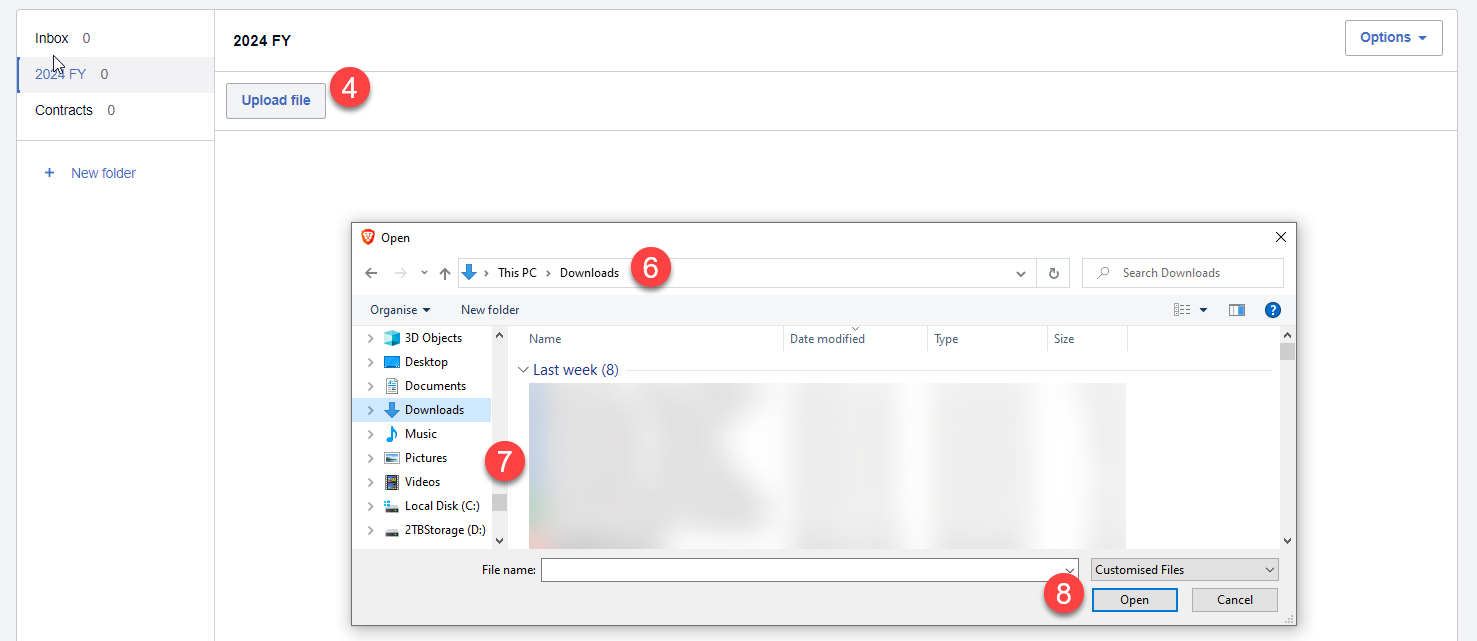
4. Click
'Upload File' to add new documents
...
6. When you click 'Upload File' the explorer menu will open. Navigate to the area where this document is saved on your computer.
7. Find the file that you want to upload.
8. Click
'Open'
9. The explorer pop up will close and you will then see your document saved in the Files area.

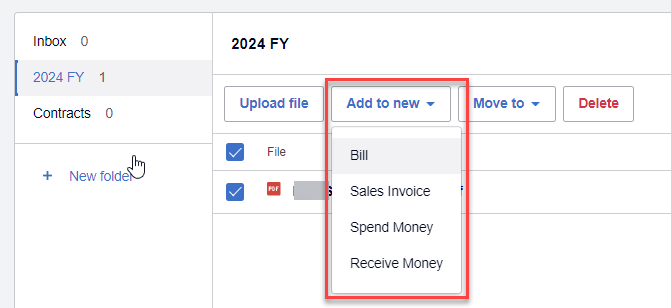
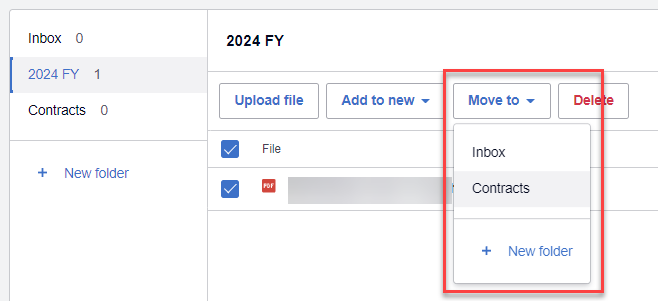
10. Once the file is uploaded, if you select it then the additional menu items will become available. this will enable you to choose what you would like to do with it. Delete is obviously self explanatory but we'll describe the other two steps further.

11. If you choose
'Add to New' then a number of new options become available. Here you can choose to create a new Bill (Creditor), Sales Invoice (Debtor), Spend Money or Receive Money transaction.
12. If you choose
'Move To' then the option will allow you to move the document to other Xero Files folders.
That is a quick overview on how to use Xero Files.
If you have any questions please be sure to reach out to your Client Services Manager.


